Bibliogrify Guide
Bibliogrify is designed to be easy to use and one you get the handle of the workflow it gets even easier. The first steps are to set up your Bibliogrify profile, and then you can dig into adding bibliographies.
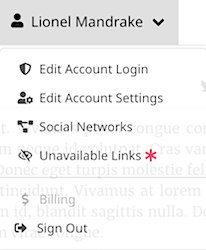
1. Start by accessing Edit Account Settings
and Social Networks from the Account dropdown menu. The Account menu will have
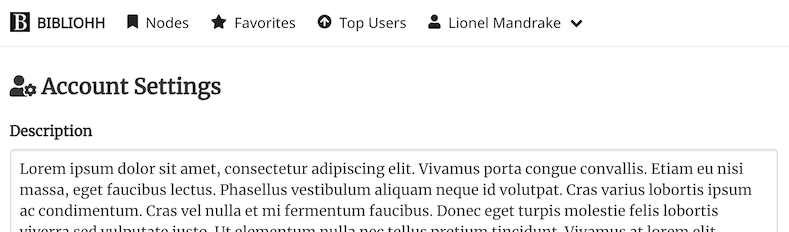
your name as it's title as opposed to "Account". This will set up your profile page where you can descibe your work and list all
the social media platforms where you post content. If you have a crowd-funding link, you can include include it in the desciption. Clicking
on the menu title item will show your profile.
2. Now select the Nodes menu option and then
click the NEW NODE button. Enter EDIT mode and input the name of the bibliography as
well as a description and the title of the content as it appears online. Next put in the primary link to the content, as well as
an archive link (just in case for some weird coincidental reason the primary link gets censored). Note that you can link the
same bibliography from every mirror of the content, so use the primary link that you expect to get the most traffic.
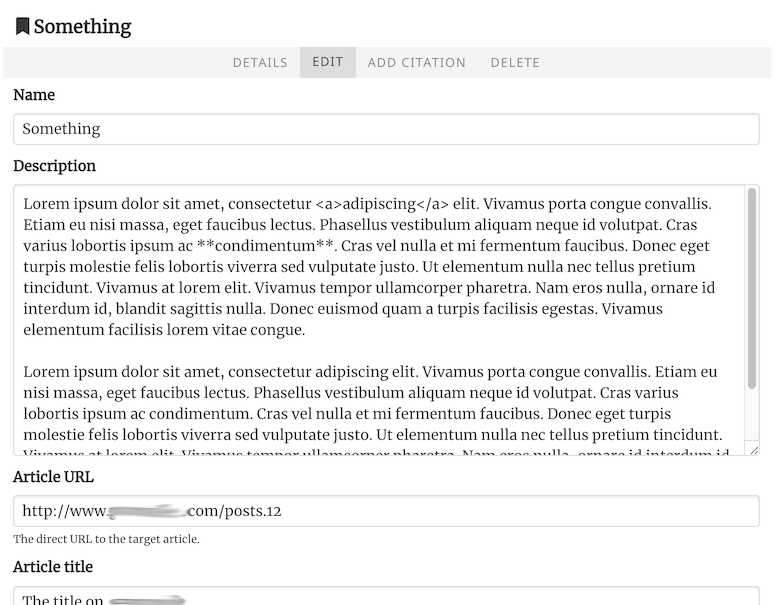
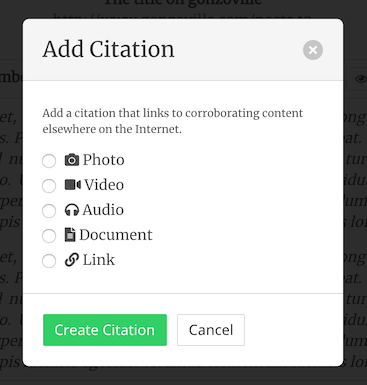
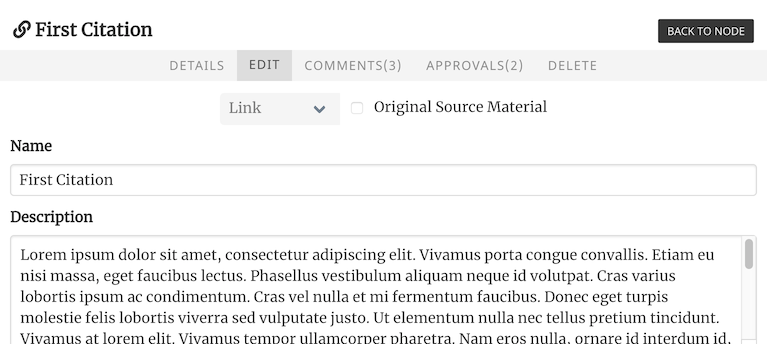
3. Next you need to add Citations to your Node from the ADD CITATION
tab link.
From the EDIT tab for the citation, repeat a similar process as you followed.
for the Node description. If you want to describe or explain the citation, there's space to do this. For instance, if you
are linking to original video footage, you may want to indicate where the pertinent section is. You can also attach a
screenshot of what the citation links to. If the citation links to a Tweet this lets you post a screenshot of it in
addition to the archival link. This protects the integrity of your content against people deleting things you reference.
4. Repeat step 3. for every citation you want to include as source material for your
content. Take note of the COMMENTS and APPROVALS tabs. These will be where other user's
comments and verifications of your citations will go. If a user wants to challenge a citation it will bear a red down-thumb icon.
You don't have to retract citations that are challenged, you can discuss it in the comments area. This allows other users
to make their case for the validity of your content and you get to reply.
Note that you won't be able to leave comments until you generate some content. This is intended to throttle people who sign
up just to cause trouble. Currently you need to create at least 2 Nodes and
4 Citations to be able to comment. Your comment status is displayed on your console page
until you have reached the requirements.
* In future releases there will be the ability to flag comments as inappropriate so the the system admins can look into users
who may be trying to abuse the system.
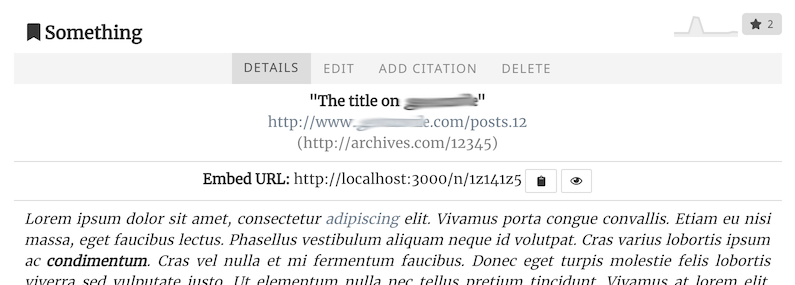
5. After you have entered all your citations, click the BACK TO NODE button
to get back to the Node. Just below the title and links on the DETAILS tab you'll see the Embed URL, use the
little clipboard icon to copy this to your local clipboard. You can then paste this into the description for every place you've
published the related content. For example, if it's a video and you'be posted it to YouTube, Vimeo, and Minds you'd include the
same link in the description of the video on each service. But that's all you need to include - the bibliography will be
consistent for each platform.
6. Now go back to the Account dropdown menu and just click on it to bring up your profile. You'll now see the Node you just added listed there. In the
upper right you'll notice a little "yin-yang" icon with a number next to it. This is your "karma" rating in the system.
The more you approve and favorite other user's content, and the more they do the same for you, the higher your "karma"
rating. The rating algorithm is basically there to tell visitors what your reputation is on the system. Someone who posts
a lot and gets approvals and favorites will have a high ranking. Someone who doesn't post often will have a lower one.
Someone who posts Fake News will have a negative rating.
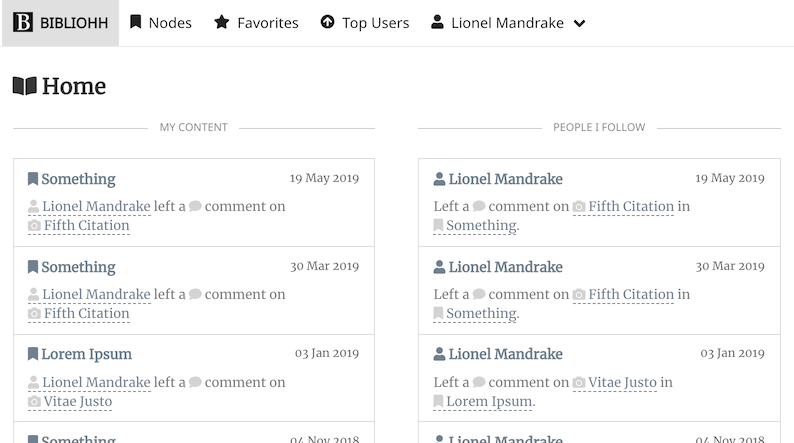
7. Now quicly click on the logo button at the top left. This takes you to the landing page which is a kind of console. On the left side is all the interactions with your content - everyone who has left a comment, favorited, or approved of one of your Nodes or Citations. On the right is recent activity with users who you've favorited. This makes it easy to know when friends have posted new content that you may want to take a look at and register approvals. The intent here is to let users form their own small social networks to fact-check each other. NOTE: this does not mean you automatically approve each other's citations - there is an expectation that users will properly fact check each other. In other words, you want to make each other's work bullet-proof.
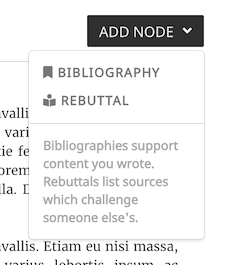
8. You can create two kinds of Nodes - Bibliographies and Rebuttals. Bibliographies (regular Nodes) document things you're written. They provide an embed URL which can be attached to whatever you've published to provide source verification. A Rebuttal is a challenge to something someone else has created. It provides an organized way to list the source material you're challenging with, as well as space to make you arguments. Rebuttals have a public URL in addition to an embed URL so that they can be easily shared on social media.
9. That's basically it. You may have also noticed a link in the
Account dropdown menu
for Unavailable Links.
The system will periodically check any links in your Nodes and Citations to see if they still exist. If a
link has been taken down, it will appear on this page. This allows you to know when content you're using
as source material (or your own content) has been removed, banned, or stricken.